Peterson’s Volume 35, January-June, 1859

Dear Sis,

I’m currently crocheting a toddler cardigan from a period photograph, it would have been nice to find these patterns for toddler knit wear a few weeks ago…lol.

Winter Cloak Pattern

Edging to Tat

Under-Sleeves to Knit

Infant Petticoat to Knit

Knit a Toddler’s Spanish Polka

Child’s Sacque Pattern

Mittens to Knit

Child’s Basque to Knit

Child’s Hood to Knit

Basque Pattern for a Young Lady

Evening Dress Body Pattern

Happy Historic Crafting!

Love,

b


Like our content? Clicking on an advertisement helps us pay for our blog!


Peterson’s Volume 34, July-December, 1858

Dear Sis,

Another fun dump of period patterns!

Burnous Mantilla to Sew

Carriage Bag in Crochet

Pattern for a Boy’s Dress

Sack for a Little Girl

Short Purse in Crochet

Child’s Drawers

Happy Period Crafting!

Love,

b


Like our content? Clicking on an advertisement helps us pay for our blog!


Peterson’s Volume 33, January-June, 1858

Dear Sis,

You cooked up a crazy plan to add period patterns to the blog! You’re crazy… this is going to take forever, but of course I’m on board:)

Edging to Crochet


Directory of Crochet Stitches

Girl’s Silk Apron to Sew

Vandyke Bracelet to Bead

Little Boy’s Jacket to Sew

A Talma in Crochet

Opera Hood in Crochet with Knit Boarder

Baby Sock in Crochet

Directory of Knitting Stitches

Mourning Purse in Crochet

Scarf Mantle to Sew

That’s all for volume 33! I’m especially excited for the crochet and knit stitch directories. It will be helpful for transposing modern knowledge for period crafting!

Love,

b


 Clicking on an advertisement helps us pay for our blog!


2021 Crafting in Review

Hey Sis,

For some reason, I like to do a yearly album of things I create. I started doing this on Facebook, and figured… why, not the blog? Here are all the things I made in 2021! Can’t wait to get crafting this year 🙂

For the first half of the year, I was really into hand dyeing and making cloth diapers. Stretchy flats were my main craft.

Then, I took a dramatic turn back to historical sewing and knitting as we started to attend living history events again.

June

Summer Indian Sheer 

Blue Miser Purse

July

First I made a purse for you, that we decided to not keep

Then, I made this one, which we decided was a keeper!
Brandy’s Pink Miser Purse

Then together, we finally finished your pretty Sheer Dress. 

Brandy’s Sheer Dress

Then, for some reason I went on a Paletot making craze. I ended up making three, before I made one that I wanted to keep. Number one –  This one, I made the armseye going into the bodice to much. It was also black, and after spending all this time on the design. I decided I wanted it to stand out on a brighter colored coat.


Number two – I made this one to sell, as I had extra fabric and I wanted to smooth out the fitting issues before making my coat in the blue wool that I ordered.

August

In

In August, I made my very first silk day dress. This was a reproduction of an original dress and it took forever to sew all that velvet trim! I still haven’t worn it to an event, hopefully this year! 

September

I had a washing accident with my sheer Indian printed gown, and ended up having to dye it pink so it wasn’t all splotchy. I really miss the original cream color, but it isn’t bad.

I worked on a few projects during this month, but didn’t finish anything until October.

October

I made my very first silk organza dress, and ended selling it! I really don’t like the feel or the look of the fabric. I also ended up not liking the print. So, it went bye bye.

Silk Organza Dress

Then, I finally finished my coat! I ended up combining both of my coat designs. Very labor intensive, but worth the work!

Then, I made a pair of embroidered cuffed undersleeves for a dress I was working on.

November

November was a fun month, I finished my very first fashion plate inspired dress. I made my first fabric covered buttons, made a neck bow, and a cute belt to go with the dress.

I also worked and finished a pattern for Tunisian Crochet undersleeves from Godey’s 1865

December

Was the craziest month of all. We decided to go to an event, and I didn’t have any winter wear for the kids.

Both kids needed wool petticoats and dresses. Grant’s frock and Evelyn’s Dress

Then, of course they needed some outer wear. 

Evelyn’s 1859 Winter Casaque from Peterson’s Magazine, with a matching hood.

Grant got a very patriotic hood and coat. I even knitted the kids little mittens and attached them to the coat sleeves.

I also finished a hood that had been on my to do list for a year!

I also whipped up two pairs of garters for both of us sisters!

And right before the end of the year, I finished trimming your winter coat!

I’m sure I missed some stuff! Particularly, the modern things I made. lol. Can’t wait for next year. I already have a head start on a few exciting projects, and so many plans!

Love, Jamie


Piggy Hats

Dear Sis,

Charlotte is very picky about hats, but she also has a tendency to get cold easily. I found a hat that our pig lover just might wear. Originally, I was looking on Etsy, but quickly realized I could make one for a faction of the cost. I actually made four for $18.00 and I still had yarn leftover. They will be Christmas gifts for all of our kiddos. We’ll have to get a picture of them wearing them all together:)

I used this FREE pattern from the Repeat Crafter Me blog.

Since the pattern does not provide any gaging information or measurements for the various sizes (NB – adult). I made the hats to measure as I worked. With two measurements, you can make these hats tailored to any sized head:

  1. Head Circumference – measure all the way around the head where it is fullest
  2. Hat Depth – measure from the center top of the head to the point on the forehead where you wish the hat to end. The image below shows exactly what I’m trying to describe:)


This pattern works up beautifully, but I did make a few changes:

  • Pig Ears – are worked in two layers, one in the lighter shade of yearn and one in the darker yarn. Instead of sewing the two layers together as the pattern suggests, I used the lighter shade to single crochet around them. This creates a boarder of the lighter shade around the darker shade, which I prefer visually.
  • Ties – the tie instructions are very vague and create thin ties. I cut nine (24 inch) strands of yarn. Folded them in half in half and used my largest crochet hook to pull them through the bottom of the earflap, as pictured below. 

Then, pass the ends trough the on the other side of the earflap and pull them tight carefully so that all ends are about the same length.

Divide yarn into three groups of six stands and braid. Secure braid with a knot.

Happy Crafting!

Love,

b


Simple Floral Granny Square Baby Afghan

Dear Sis,

I find out if I’m having a boy or girl at the end of the month, so I thought it best to finish the afghan I started last summer. I figured I’d never finish it if we are having a boy:) Now, it is ready to use or gift as needed.

Floral Popcorn Square Patten

Five Inch Granny Square

Ch 4. Join to make loop.

Center Round: Start with ch 4, counts as first (dc, ch 1). 8 (dc, ch 1) around, join with slip stitch in first ch space.

Flower Round: Start with 3 ch, dc 4 (5 stitch Popcorn). Ch 3 between Popcorn Stitches, 8 Popcorn around, join with slip stitch in top of first Popcorn.

Circle Round: Start with a ch 3 in space between Popcorn stitches, dc 2 (reserving a loop with each stitch so that 3 loops remain) YO, draw through 3 loops to complete Starting Cluster. Ch 2, dc 3 (reserving a loop with each stitch so that 4 loops remain) YO, draw through 4 loops to complete Cluster. (Cluster, ch 2, Cluster, between each Popcorn) Join with a slip stitch in 2 ch space.

Square Round: Start in 2 ch space, ch 3, dc, in same space, 3 hdc in next ch space, 2 dc in next ch space, for corner (3 trc, ch2, 3 trc), for side (3 dc in next space, 3 hdc in next space, 3 dc in next space) Finish round with a dc next to the first st, join with a sl stitch.

Afghan Assembly & Shell Boarder

  • 49 Squares (9×9) Seamed together
  • Shell Boarder
    • Dc Round: dc in each stitch from each square round. On straight, sides also place 1 dc in each (2 ch corner space). On corners (dc 2, ch 2, dc 2)
    • Shell Round: (5 dc) two spaces away, (sc) two spaces away, repeat around.

Happy Stitching!

Love,

b

Baby Sweater Pattern

Hi Sis,

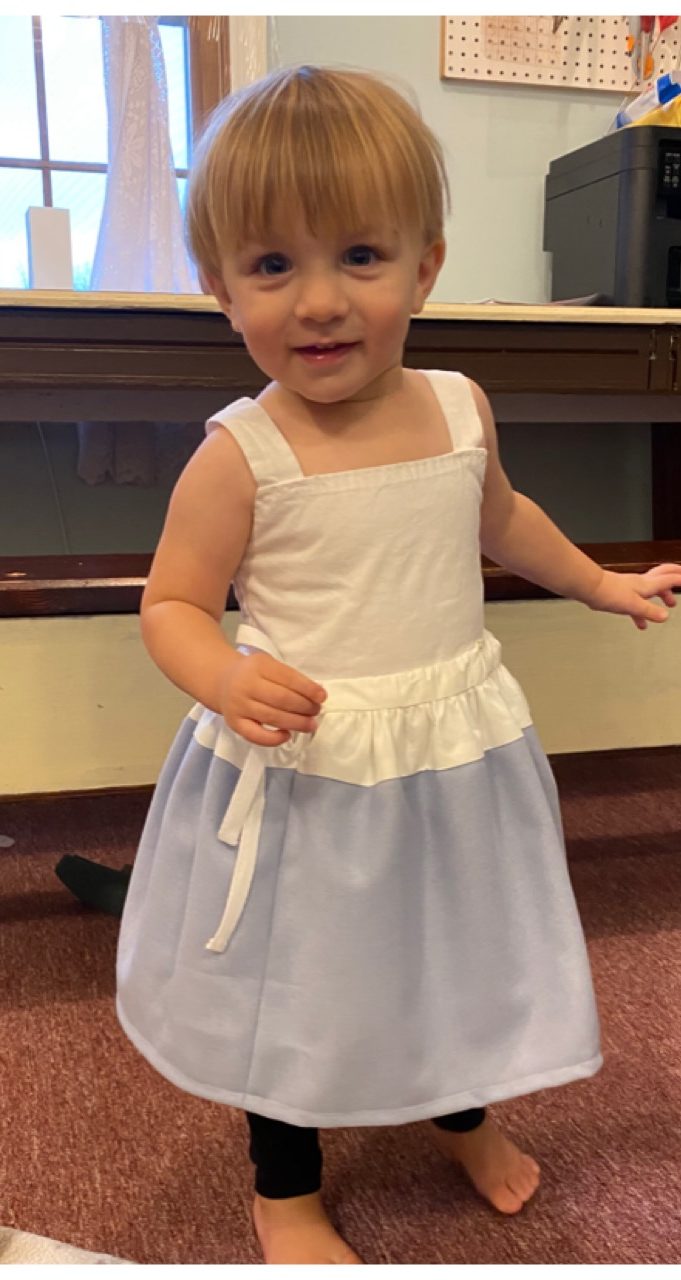
Sometimes I enjoy making projects that don’t take months to complete. This cute and fast working baby sweater is one of them. I can actually make this sweater in a day! It is also seamless, and not a fitted garment so it should last a little one awhile. Evelyn started wearing hers when she was wearing 0 – 3 month old clothing, and it still fits her at 3 – 6 months.  

Note: While I did use this weather for a living history event, this is not a historical pattern! 


Material List

Soft worsted or dk weight yarn
Size I hook 

Sleeves

Chain 22. Slip stitch to join in round.

Chain 3 (first double crochet) double crochet around. Join in the round by slip stitching into the top of the chain 3. (22 stitches total).

Continue in this fashion until you have eight rows of double crochet. Fasten off. Make another. Trim your sleeves in a row of single crochet in a contrasting color.

Body

Chain 52. 

Row 1: Double crochet in fourth chain. Double crochet in each chain until the tend. In the last stitch, do (2 double crochet, 2 chain, 4 double crochet, 2 chain, 2 double crochet). Then, double crochet along the other side of your chain. When you reach the other end, turn the corner in the same fashion as the first corner. Remember, the chain 3 at the start of the row counts as your first double crochet. Join row by slip stitching into the top of the chain.

Rows 2 – 5:  Chain 3 and double crochet in each double crochet across. In the chain spaces below do (2 double crochet, 2 chain, 2 double crochet). Join row with a slip stitch into the top of the third chain. Yes, your row will not end at the corner anymore…. see picture below to see where I fastened off.

Fasten off

Shoulder Section

There should be 66 stitches total along the long side of your sweater base. If not that is okay, you can add or decrease stitches in your next row. I recommend decreasing/increasing at the sleeve area, so it will be difficult to see your increase or decrease.

Join yarn on the start of a long row, in the chain 2 space. Chain 3, double crochet 16. Now stop! Pick up a sleeve. Double crochet all the way around the 22 stitches in the sleeve. Slip stitch into the first double crochet on your sleeve, this will prevent a hole. 

Now, go back to the sweater base, double crochet 34 stitches, do the other sleeve, double crochet 17 stitches. Your last stitch should end in the chain space. Turn work.

Row 2: Chain 3, double crochet in the next 14 stitches, double crochet 5 stitches together, double crochet 19 stitches on the sleeve, double crochet 5 stitches together, double crochet 28, dc5t0g, double crochet 19, dc5tog, dc15. Turn work.

Row 3: Chain 3, dc 11, dc5tog, dc15, dc5tog, dc24, dc5tog, dc15, dc5tog, dc12

Row 4: Chain3, dc 9, dc5tog, dc11, dc5tog, dc20, dc5tog, dc11, dc5tog, dc10

Row5: Chain3, dc7, dc5tog, dc7, dc5tog, dc16, dc5tog, dc7, dc5tog, dc8

Row 6: chain3, dc 5, dc5tog, dc3, dc5tog, dc12, dc5tog, dc3, dc5tog, dc 6. Fasten off.

Trimming

(Read all directions before commencing) With contrasting color single crochet around the sweater. Do 3 single crochet in ever corn. When, you arrive at the ch2 hole in the middle of each side of the sweater make your ties. Ties are chains of 36, that are slip stitched back to the sweater. Fasten off. Weave in tails.

Love, 

Jamiegoof