Dear Sis,
William is very partial to routine… especially at bedtime. We travel at least once a month and now that he is too big for many cribs and travel beds, I decided to go the sleeping bag route. I wanted to provide something he would want to climb into! He has been owl crazy for a couple of months… and I liked the idea of an Owl Sleep Sack. I found a great picture online to inspire my creative juices. This image is actually an American Girl doll sleeping bag:)
Inspiration

Finished Sleep Sack

Finished Dimensions (30 x 60 inches, not including pillow)
Materials
2 yards fleece, striped (outer fabric)
5 yards broadcloth (lining)
2 yards flannel, dot (wings)
1 yard broadcloth (pillow sham)
White, yellow, and black broadcloth remnants (appliqué facial features)
double sided fusible interfacing, such as WonderUnder
standard pillow, 20 x 28 inches
20 inch zipper, matching lining fabric (sleep sack closure)
4 hooks and eyes (sham closure)
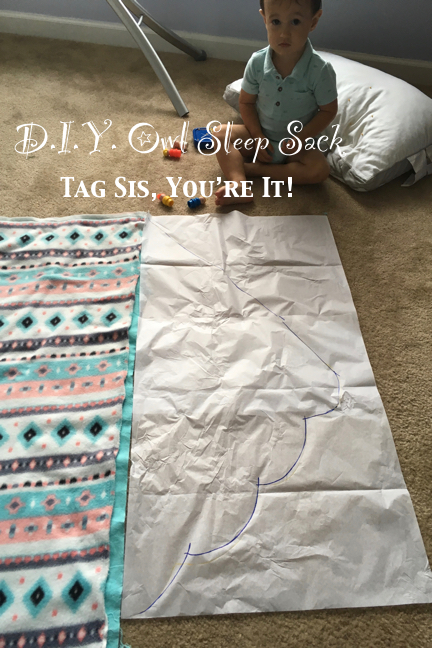
tissue paper and clear tape (pattern making)
Assembly
- Fleece is 60 inches wide. To create 2, approximately 30 inch wide by 60 inch long panels, for the front and back of the sleep sack, it is easiest to fold the fabric in half lengthwise, cut along the fold, and trim away the bulky salvage on the other side. As a bonus, this cutting technique should also make it easier to match the fabric stripes at the seams.
- Most broadcloth comes 45 inches wide. Although, it actual measures more closely to 44 inches. Fold 5 yard section in half lengthwise, so that you have two panels that are 60 inches long and cut along fold. Lay fleece panels over broadcloth panels and trim broadcloth down to 30 inches wide using the fleece as a cutting guide.
- Optional: Cut to round bottom corners of sleep sack outer fabric and lining fabric panels at this time.

- Tape two pieces of tissue paper together. Make wing pattern. Ours are just about half the length (30 inches) of the sleeping bag. Use the picture above as a visual reference. Cut 4 flannel wing panels.
- Place 2 wing panels right-sides together and seam together along the shaped, top and bottom edges, of the wing, using a 1/2 inch seam allowance. Snip cures, turn right-side-out, and press. Repeat to make second wing.
- Lay a single panel of fleece right-side up. Lay wings on top facing inward as pictured below. Secure with stay stitching.

- With wings still folded inward, place both fleece panels together with right sides facing. Sew together with a 5/8 inch seam allowance with 20 inches open on one side for the zipper. If you opted to curve the bottom of the sleep sack, clip seam allowance as needed and turn right side out.
- Place both lining panels together with right sides facing. Sew together with a 5/8 inch seam allowance with 20 inches open on one side for the zipper. If you opted to curve the bottom of the sleep sack, clip seam allowance as needed for turning, but leave inside out.
- Lay fleece sack right side up. Working with only the top panels of each layer, pin wrong-side of lining opening to right-side of fleece opening along the zipper and top edges. Sew together with 5/8 inch seam allowance. Clip corns and turn seam right side out, by inserting lining into sleep sack. Set aside and begin working on pillow and sham.
- Round the top corners of a stand sized pillow as pictured below. I found it easier to do this sewing by hand.

- Set pillow on tissue paper and trace to make a pattern for the sham cover.

- Notice in the picture above that the pattern is only half of the pillow sham. Cut the top panel on a fold. Cut 2 back panels. Note that 1/2 inch is added to the curved edge for seam allowance, 1 inch is added to the straight edges of the back panels to allow for hemming and 5/8 inch is added to the bottom for attachment to the sleep sack.
- Finish the straight edges of each sham back panel with a 1/2 inch rolled hem.
- Make a pattern for the horns and other facial features of the owl as depicted below. Oops I didn’t make a picture of the horn, but if you made it this far you aren’t helpless:)

- Fuse interfacing to the wrong-side of white, yellow, and black fabric remnants, then cut 2 eyes, 2 eye lashes, and 1 beak.
- Fuse eye lashes to eyes. Stitch around eye lashes with dense zig-zag stitch.
- Arrange facial features on top sham panel. Fuse eyes, and then beak. Stitch around eyes and beak with dense zig-zag stitching.
- Cut 4 horn pieces. I used broadcloth for the fronts (2) and flannel for the backs (2) to add a bit more structure. Seam together, right-sides together, with a 1/4 inch seam allowance, along both curved sides, leaving the bottom open. Clip allowance, turn, and press.
- Pin horns right-side down on top of sham panel. Stay stitch.
- Pin horns down, so they can’t move. Place back panels right-side down over face. Overlap rolled hems at the center. Secure with a 1/2 inch seam. Clip curve as needed, turn, and press. It should look something like the picture below.

- Place sleep sack face down. Center pillow sham face up and upside-down with fleece layer only. Remember to overlap rolled hem in the same order as it was overlapped on the top seam. The picture below should help with positioning. Sew with a 5/8 inch seam allowance.

- Turn sleep sack face up. Fold the top panel back to expose the back panel. To finish the lining along the zipper and top edges, fold lining under and pin in place. Top fold should line up with the 5/8 inch line of stitching that attached the pillow sham. Zipper fold is a bit trickier because both the fleece and the lining have to be folded under and pinned. Top stitch around the entire top opening 1/4 inch from edge.
- Install the zipper.
- Install hooks and eyes in the back of the sham at equal spacing.
- To give the horns more structure, open a small area of stitching along the outside curve. Add a bit of stuffing and whip stitch closed by hand. Put pillow inside the sham and you are done!


For even more satisfaction, have your local small person climb in and try it out:) My 20 month old son was full of hoo-hoos as he climbed in.

Happy Sewing,
b